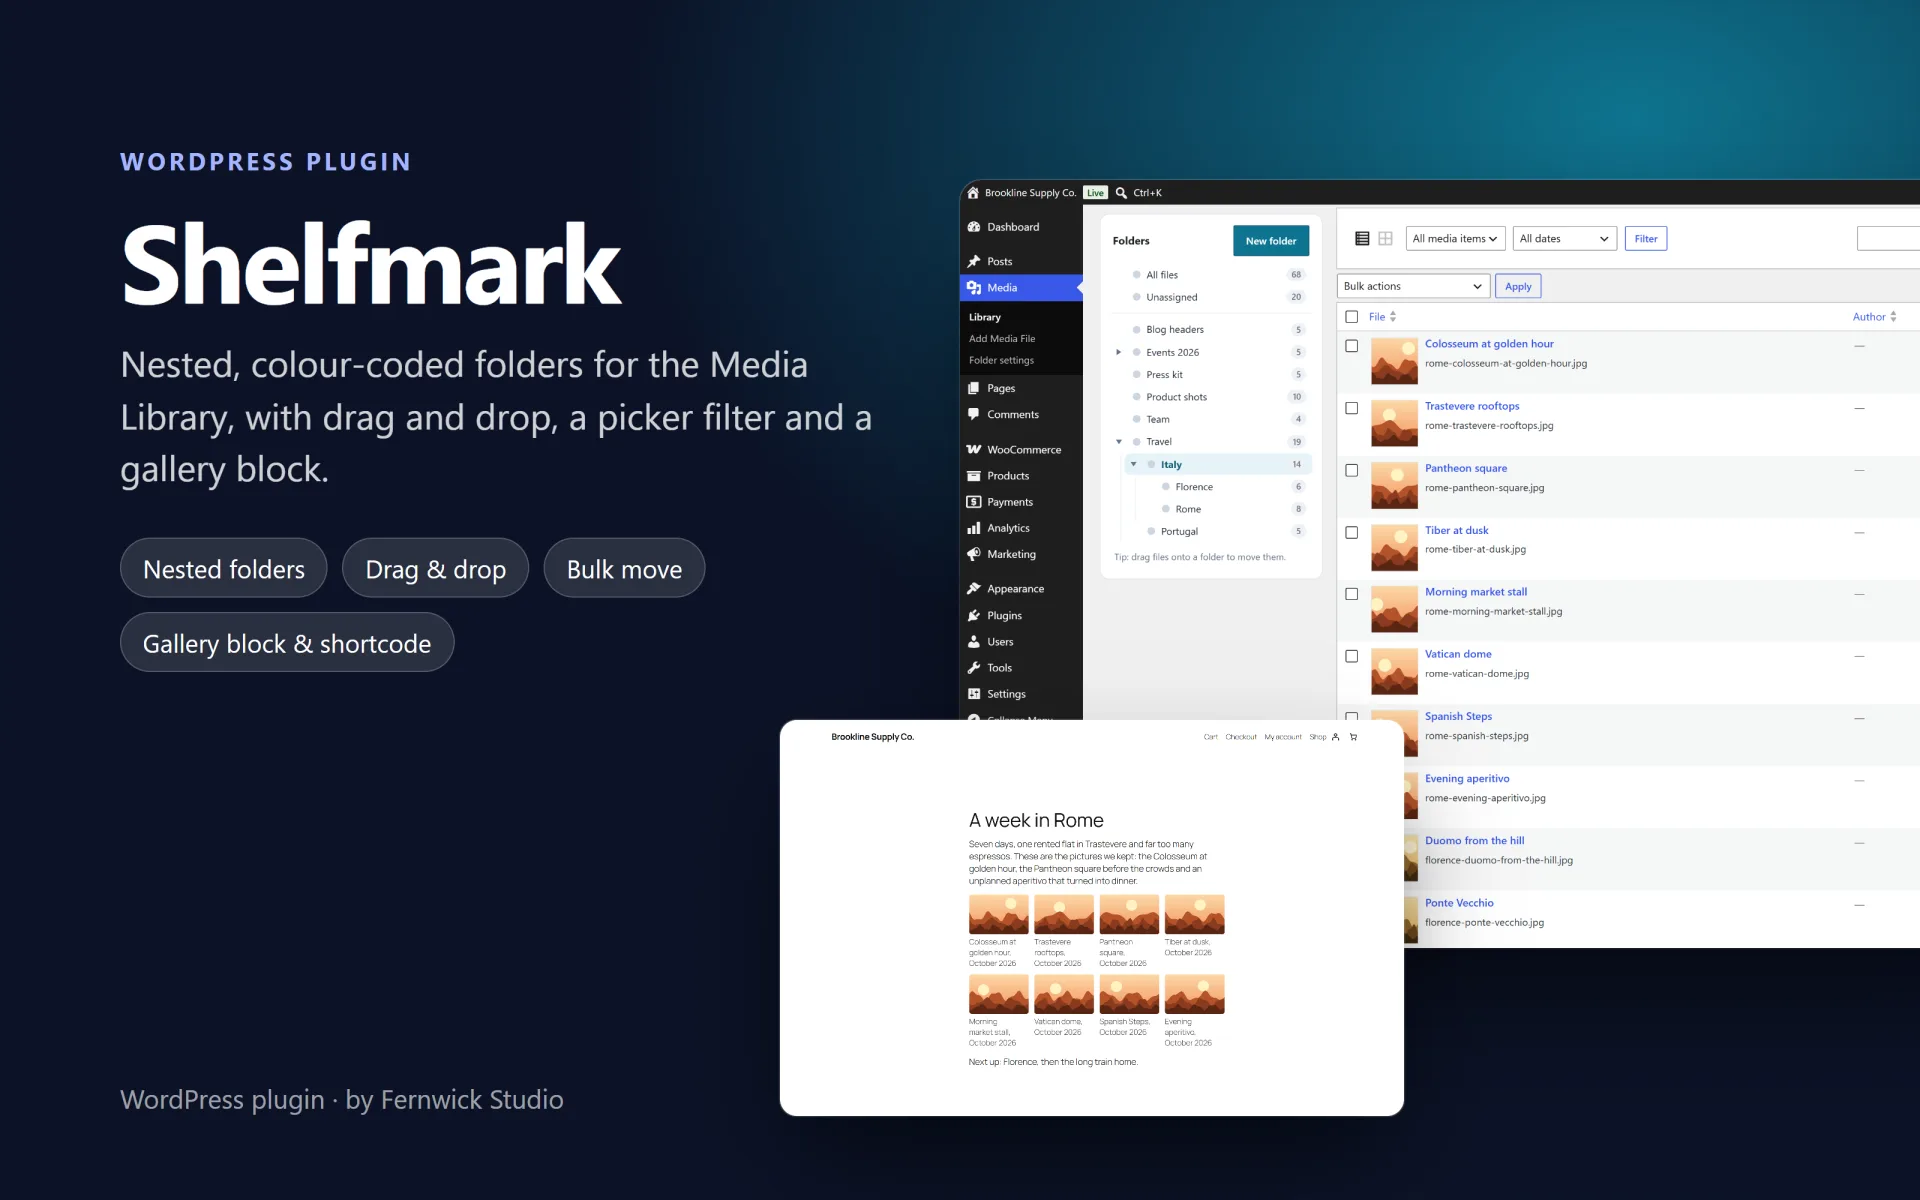
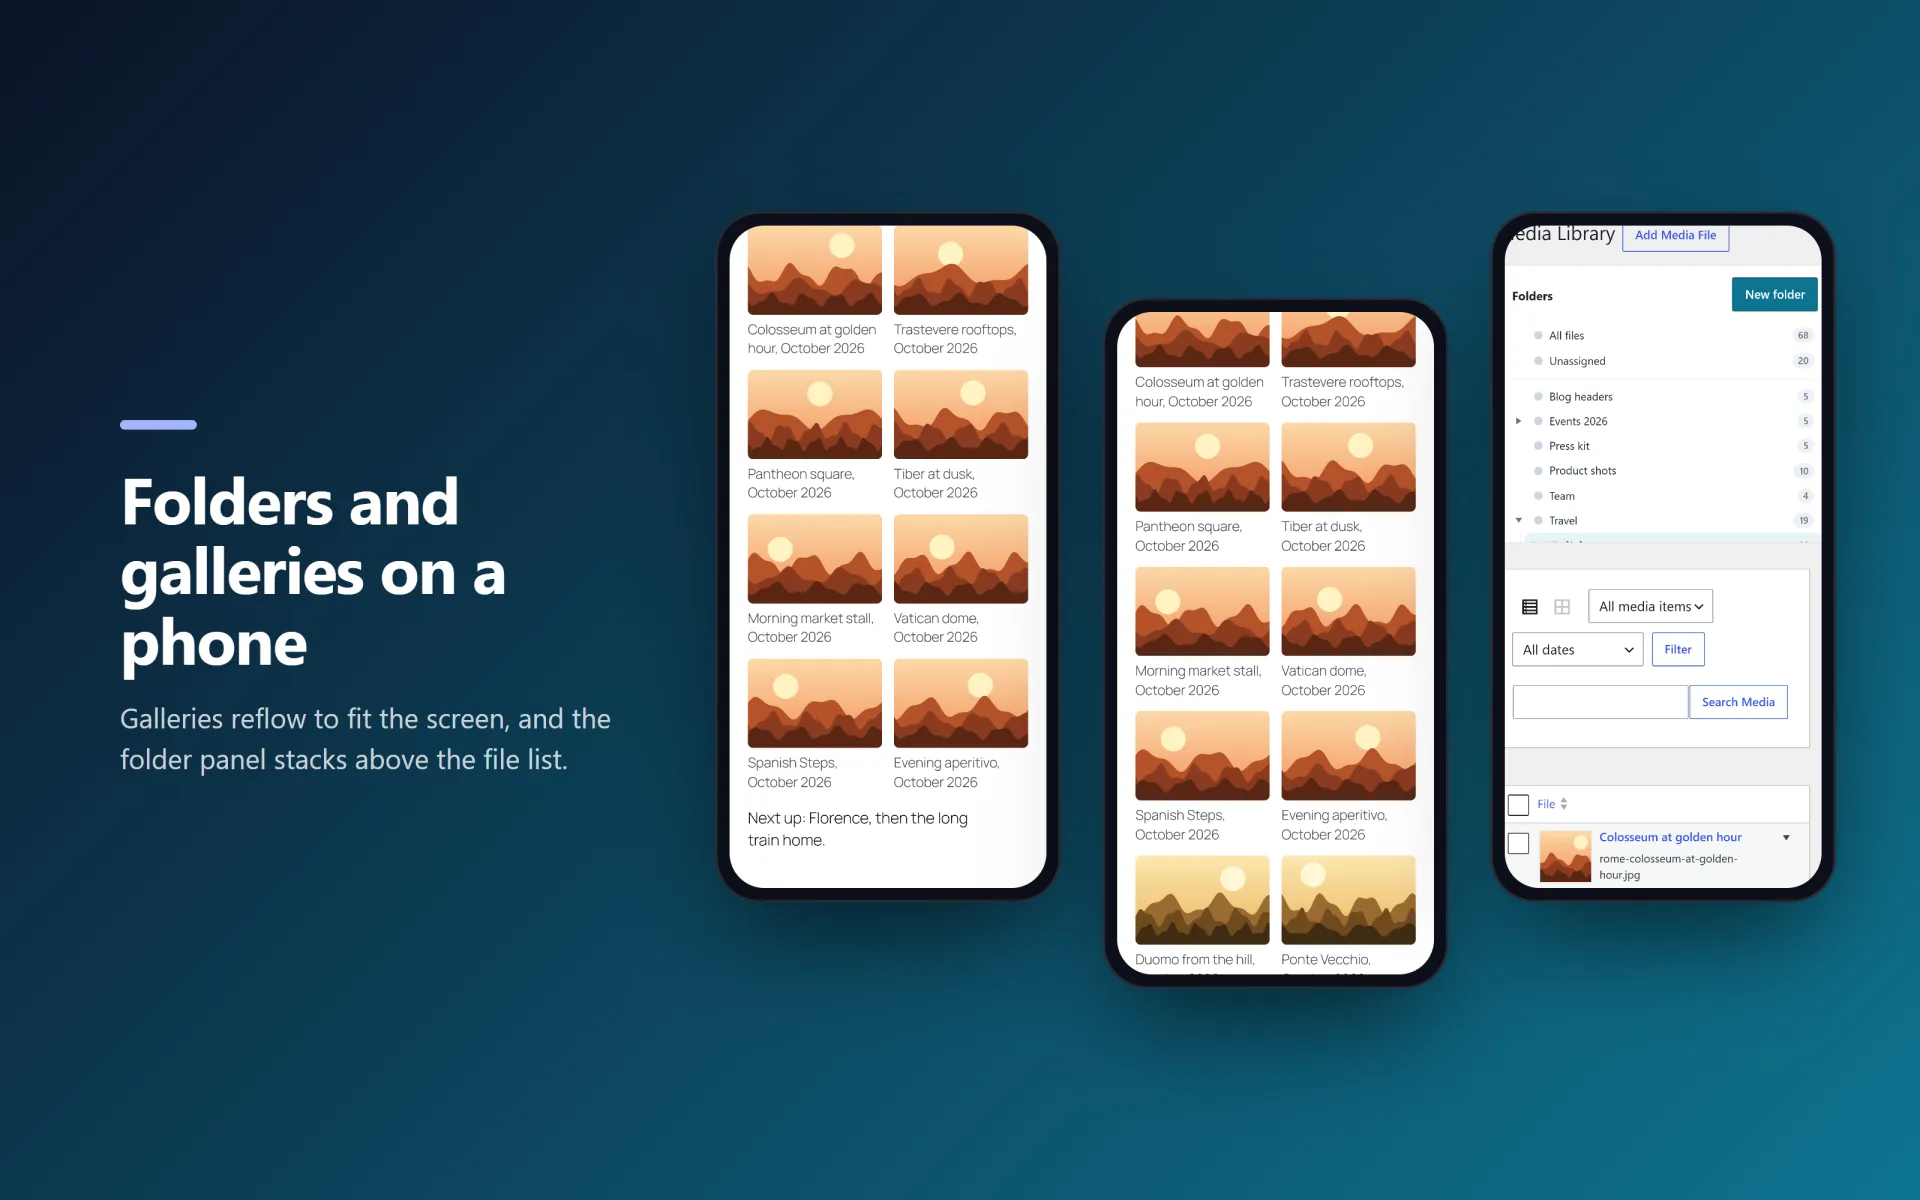
Shelfmark - Media Library Folders — Organise the WordPress Media Library in nested, colour-coded folders with drag and drop, and show any folder as a gallery.
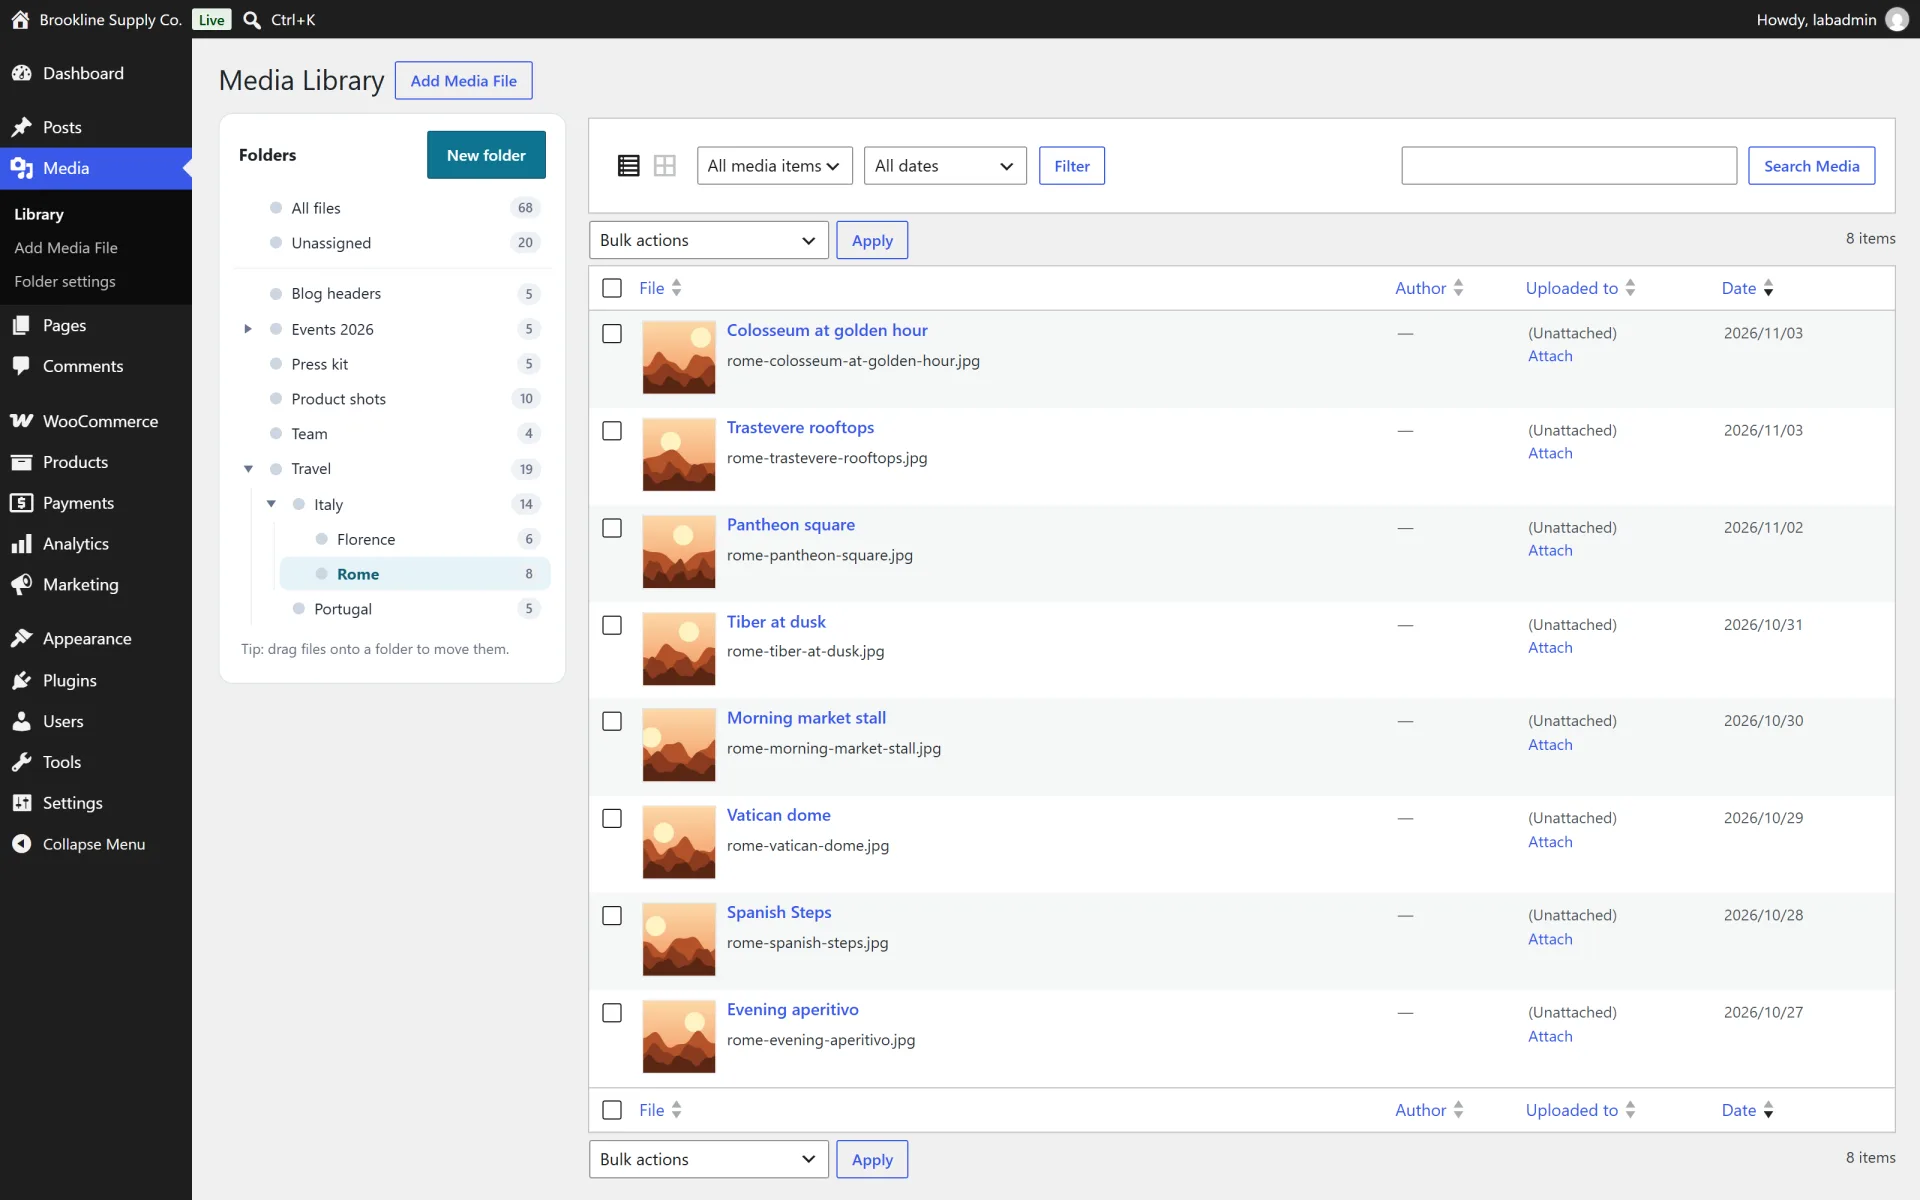
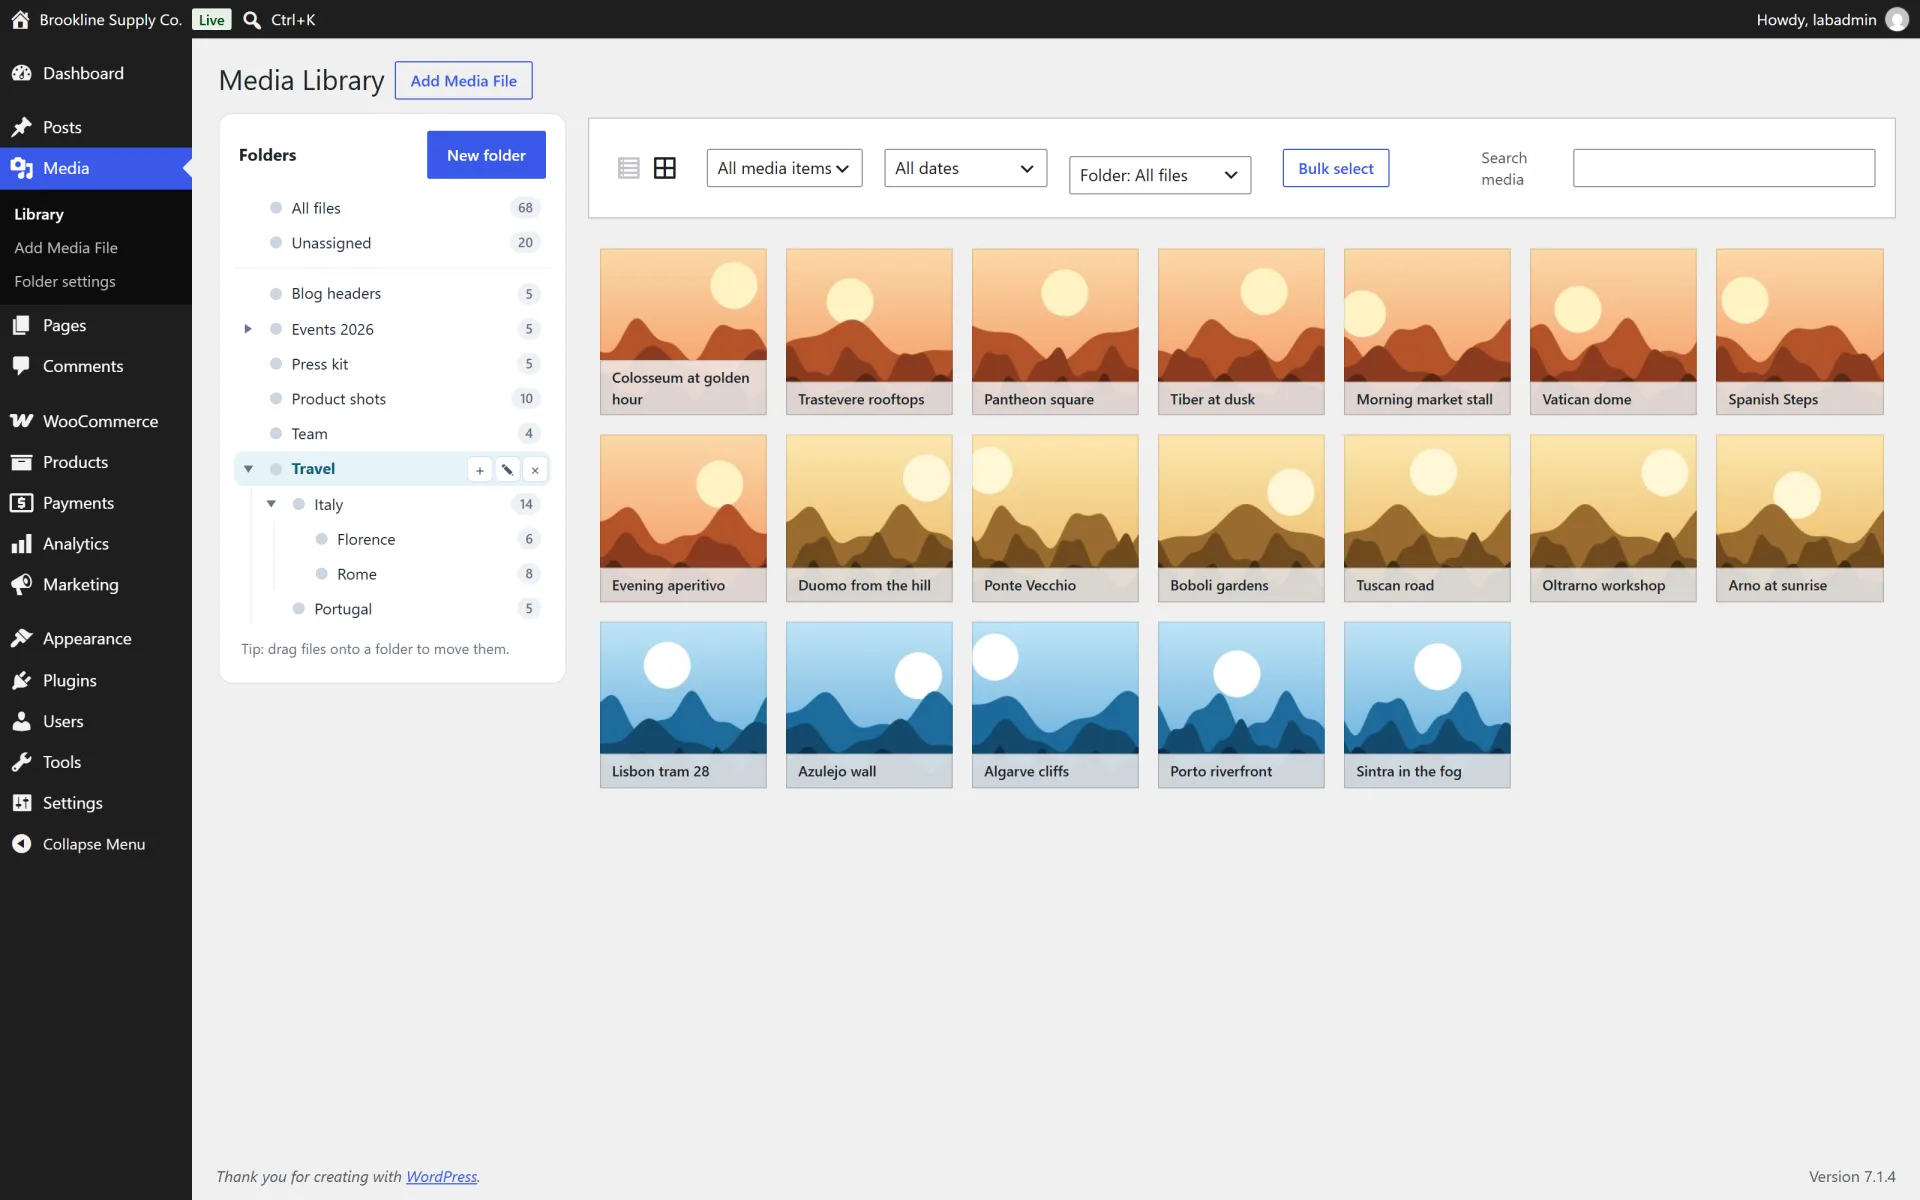
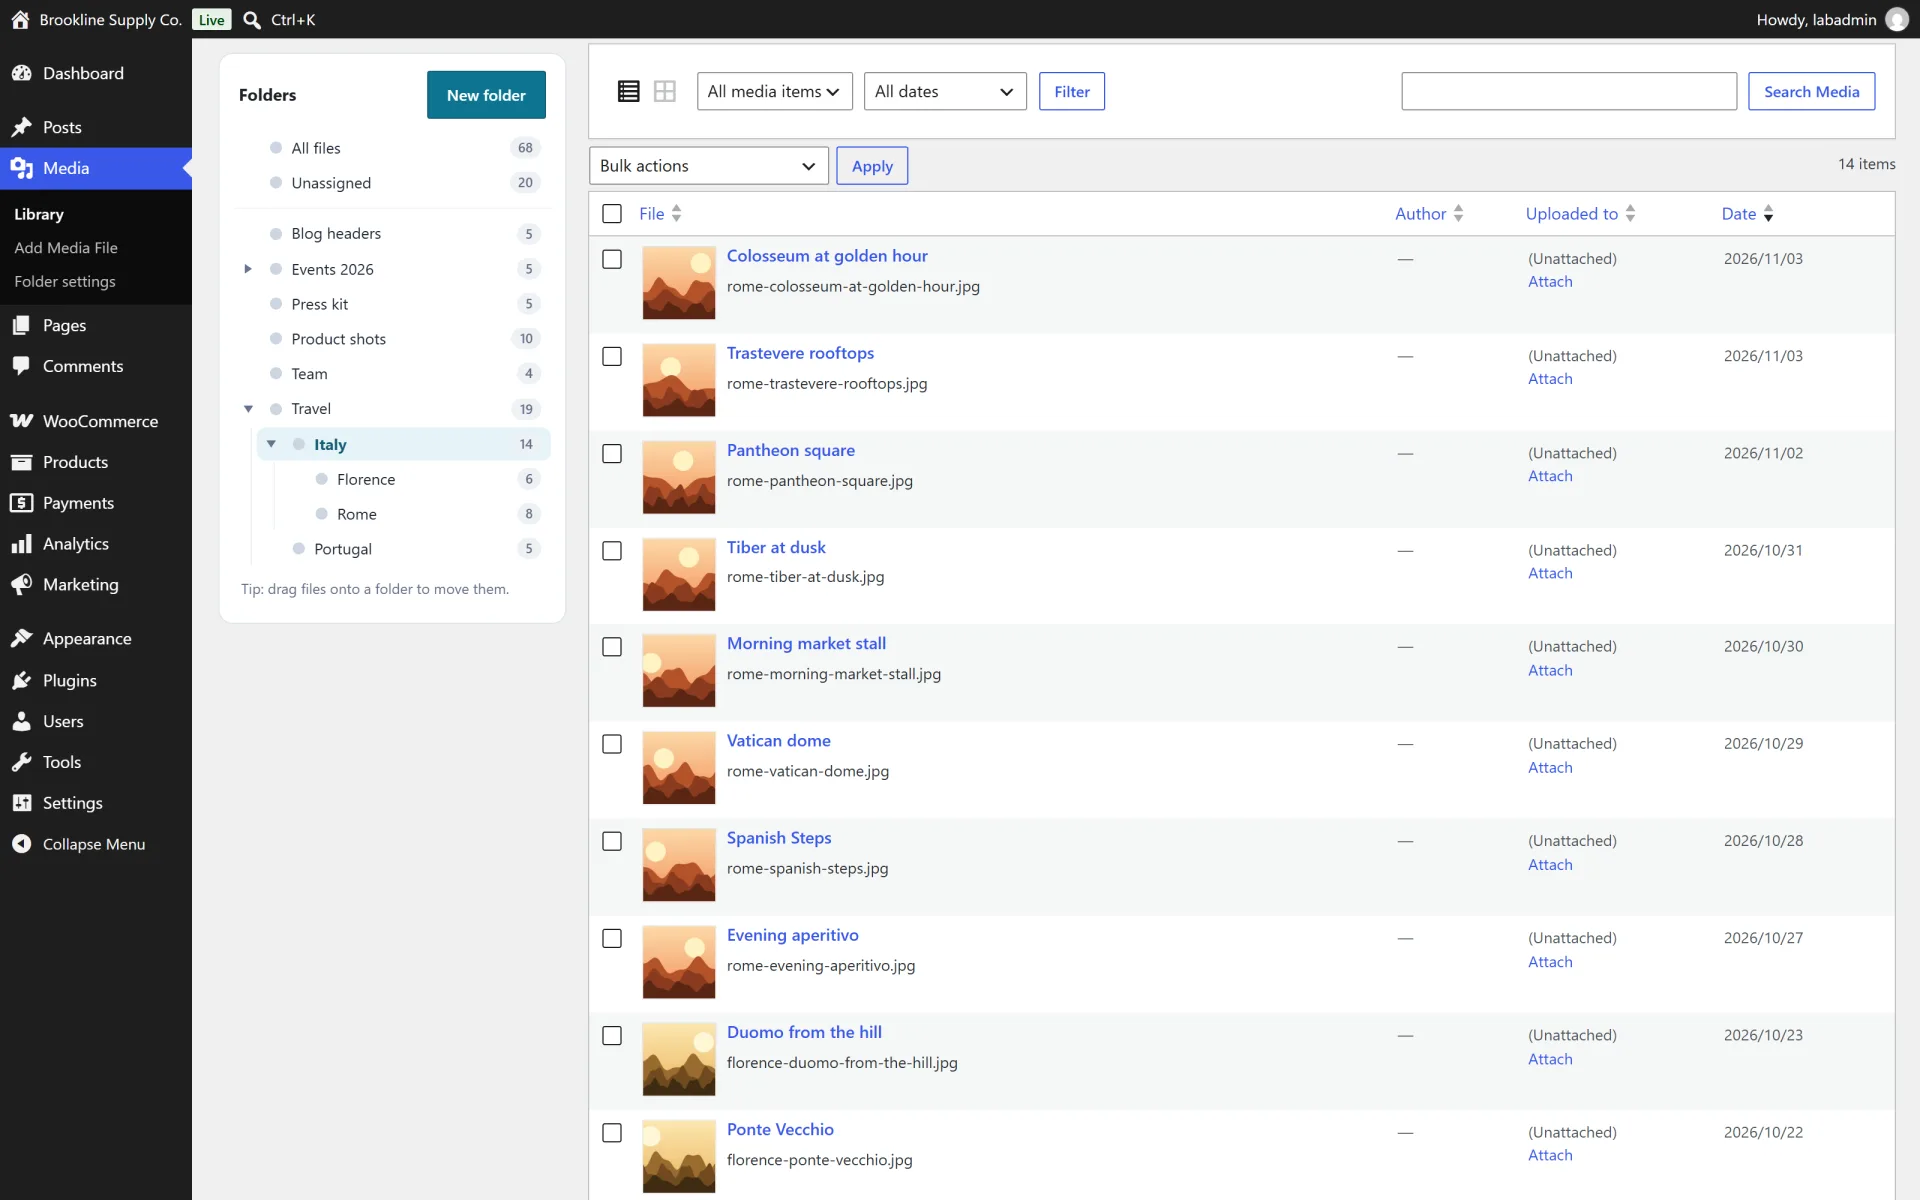
Shelfmark turns a long, flat Media Library into folders you can actually find things in. A folder panel sits next to the library in both list and grid view. Create nested, colour-coded folders, drag files onto them, and uploads go straight into the folder you have open.
The same folders are available where you pick images: the media picker in the editor and in page builders gets a Folder filter, and every file has a Folder field in its details. When you want to show a folder on the site, the Folder Gallery block and the [shelfmark_gallery] shortcode print its images as a responsive, accessible grid.
Folders are only labels. Files stay where they are on the server and keep their URLs, so reorganising never breaks a page, and deleting a folder never deletes a file. Who it is for: agencies, editors and shops with hundreds or thousands of images who want order without changing how WordPress stores media.
What you get
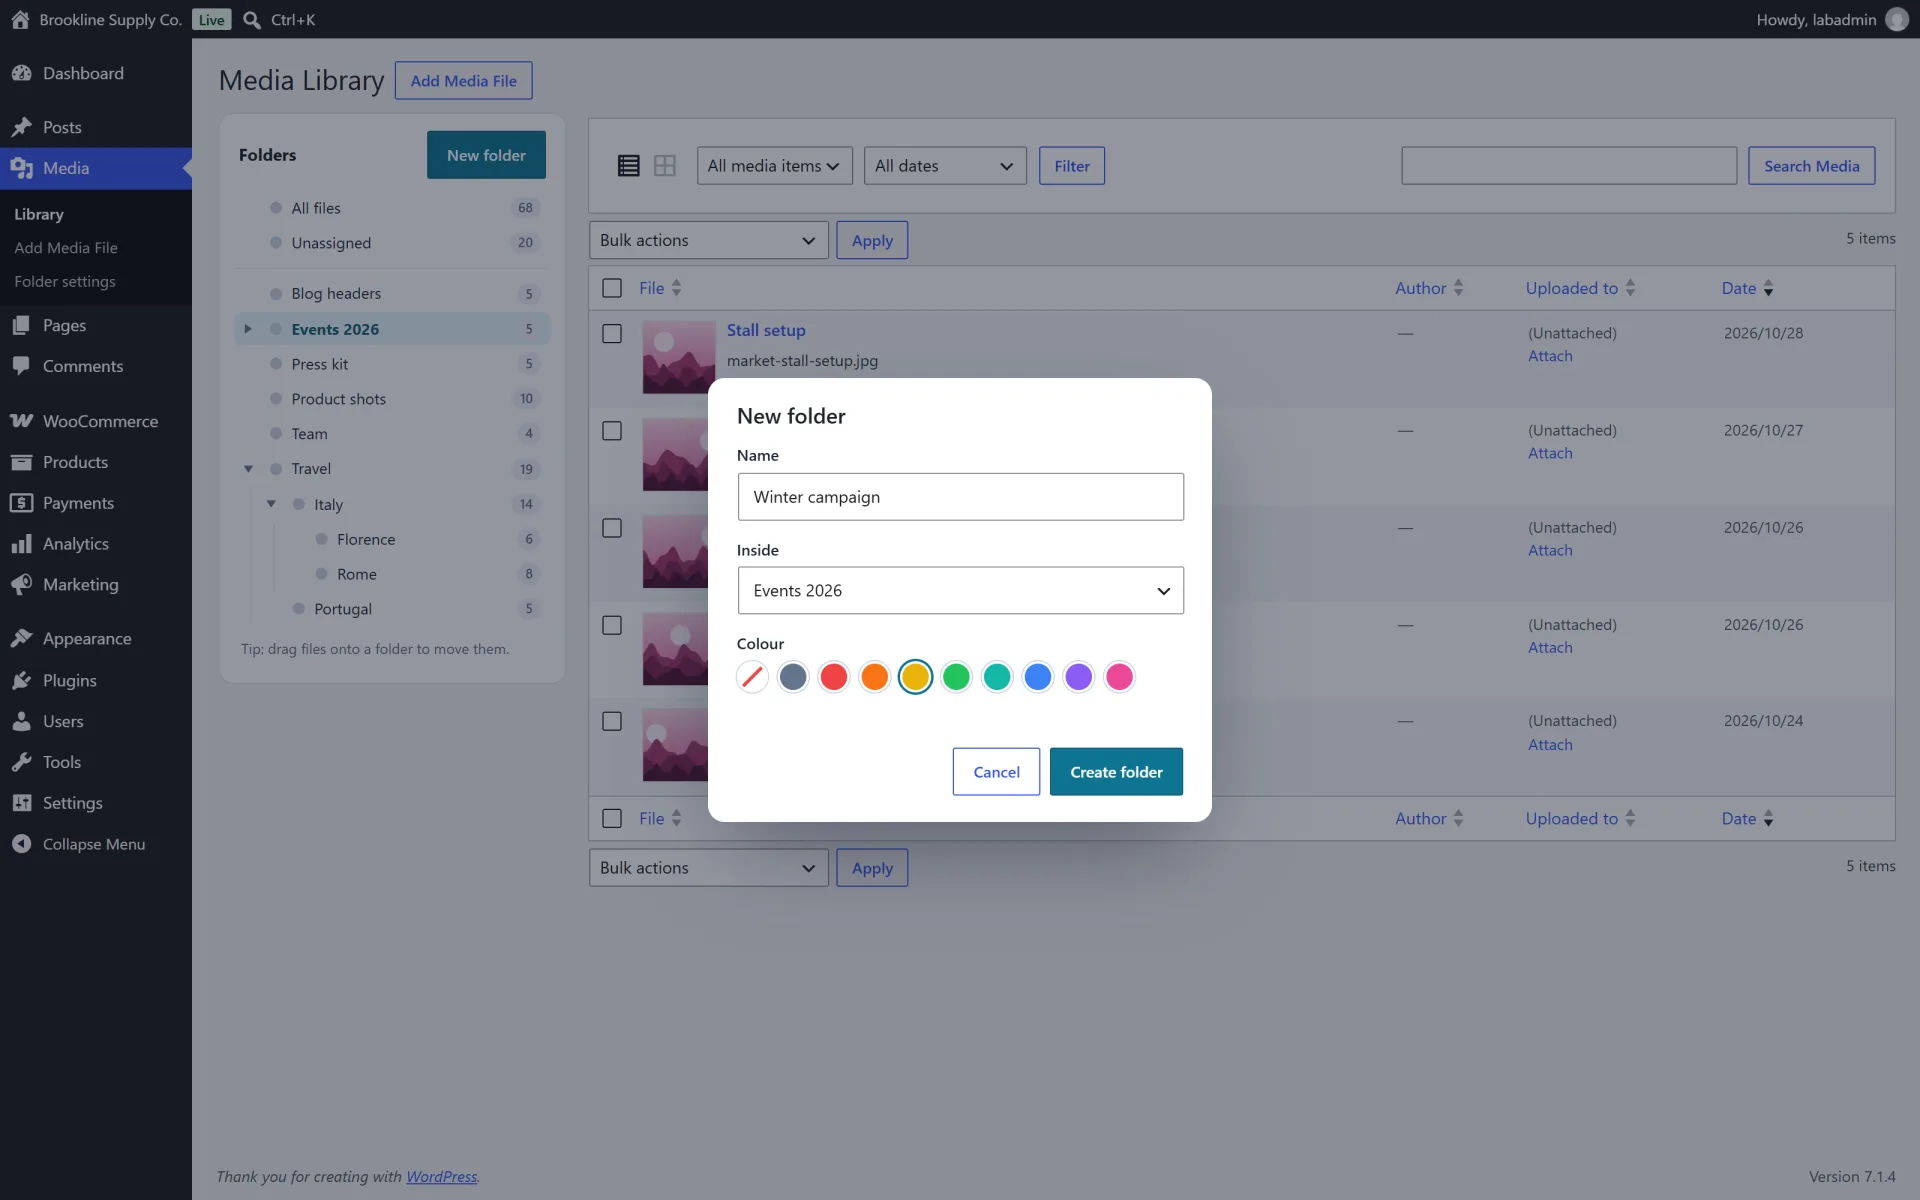
- Nested folders up to six levels deep, with a colour for each folder and counts next to the names
- Folder panel in the Media Library, in list view and in grid view, with "All files" and "Unassigned" views
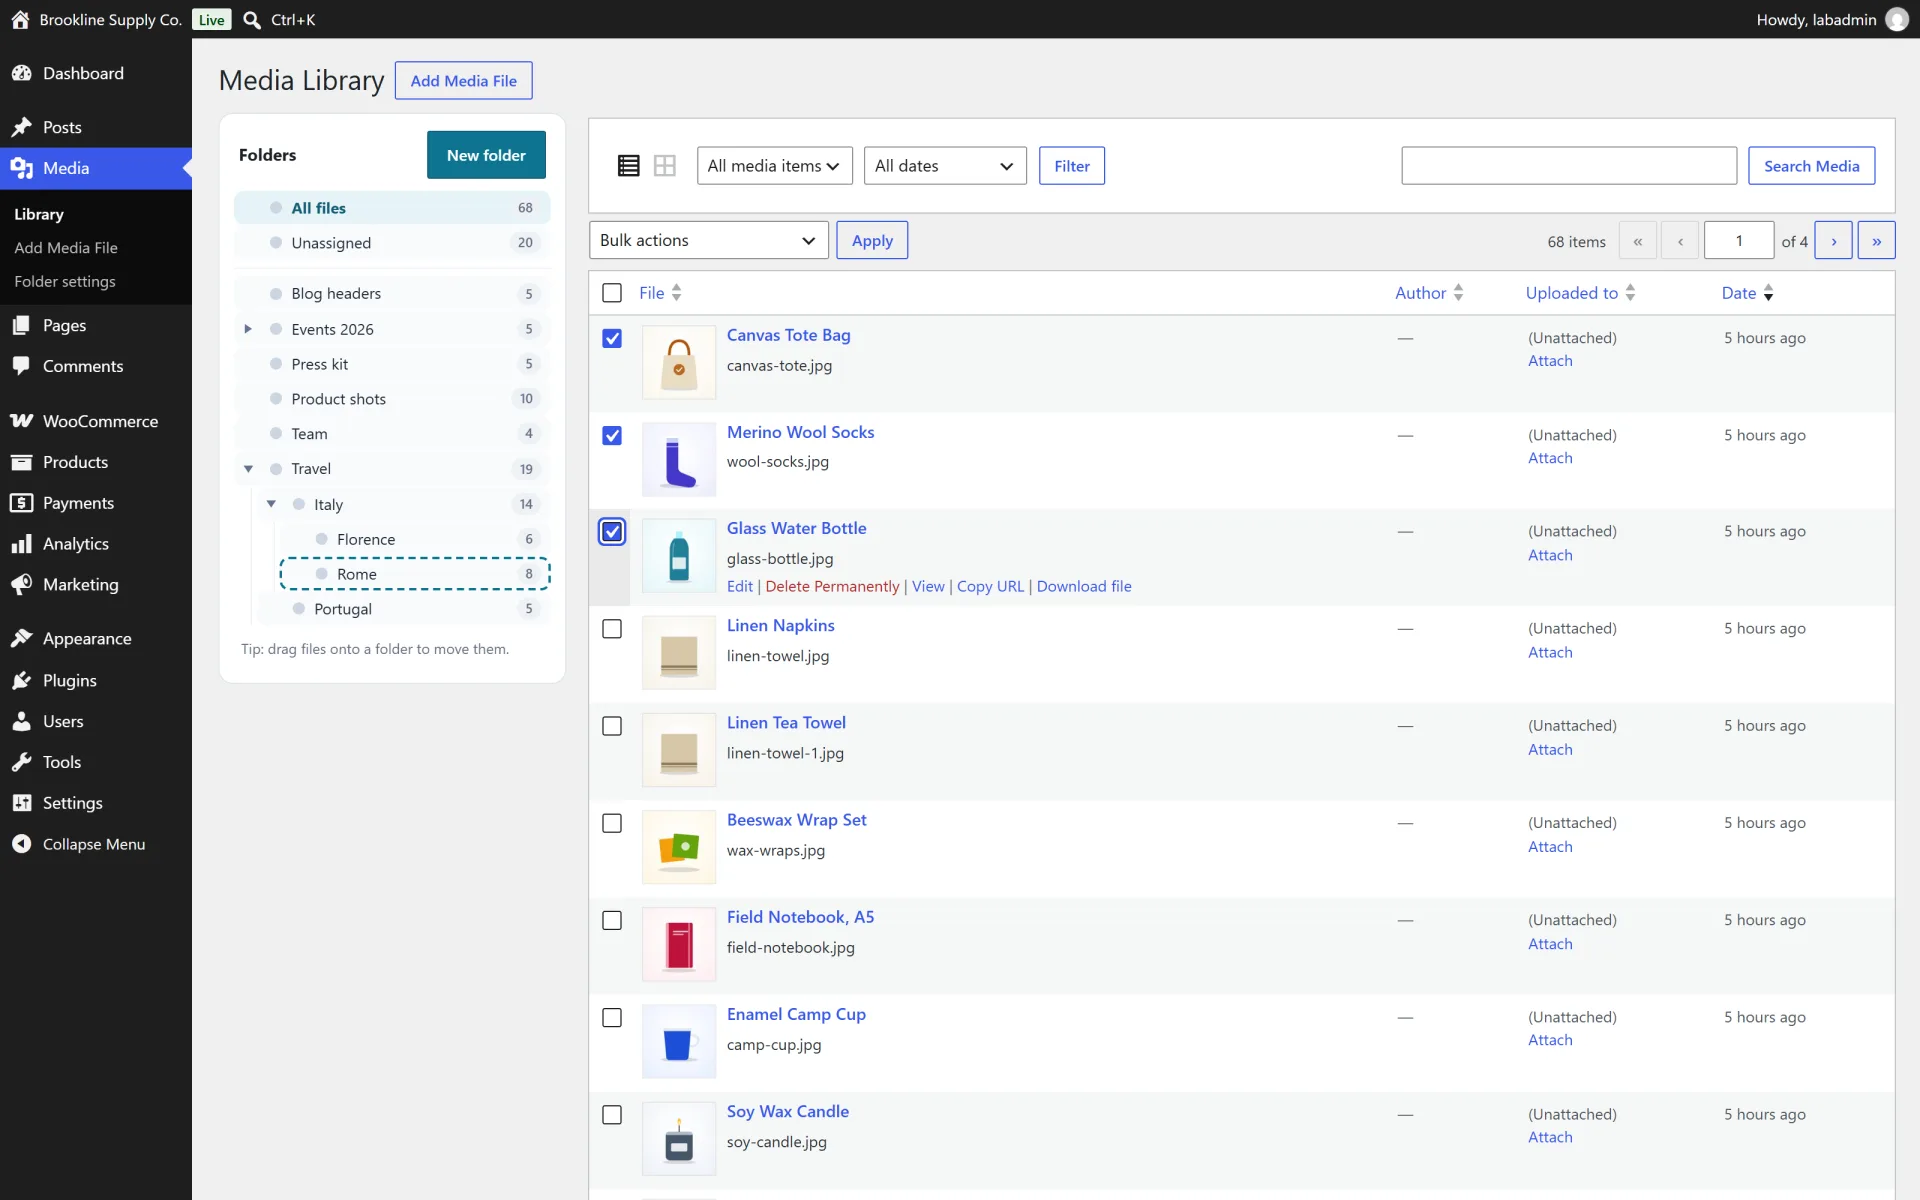
- Drag and drop files onto folders, including several selected files at once
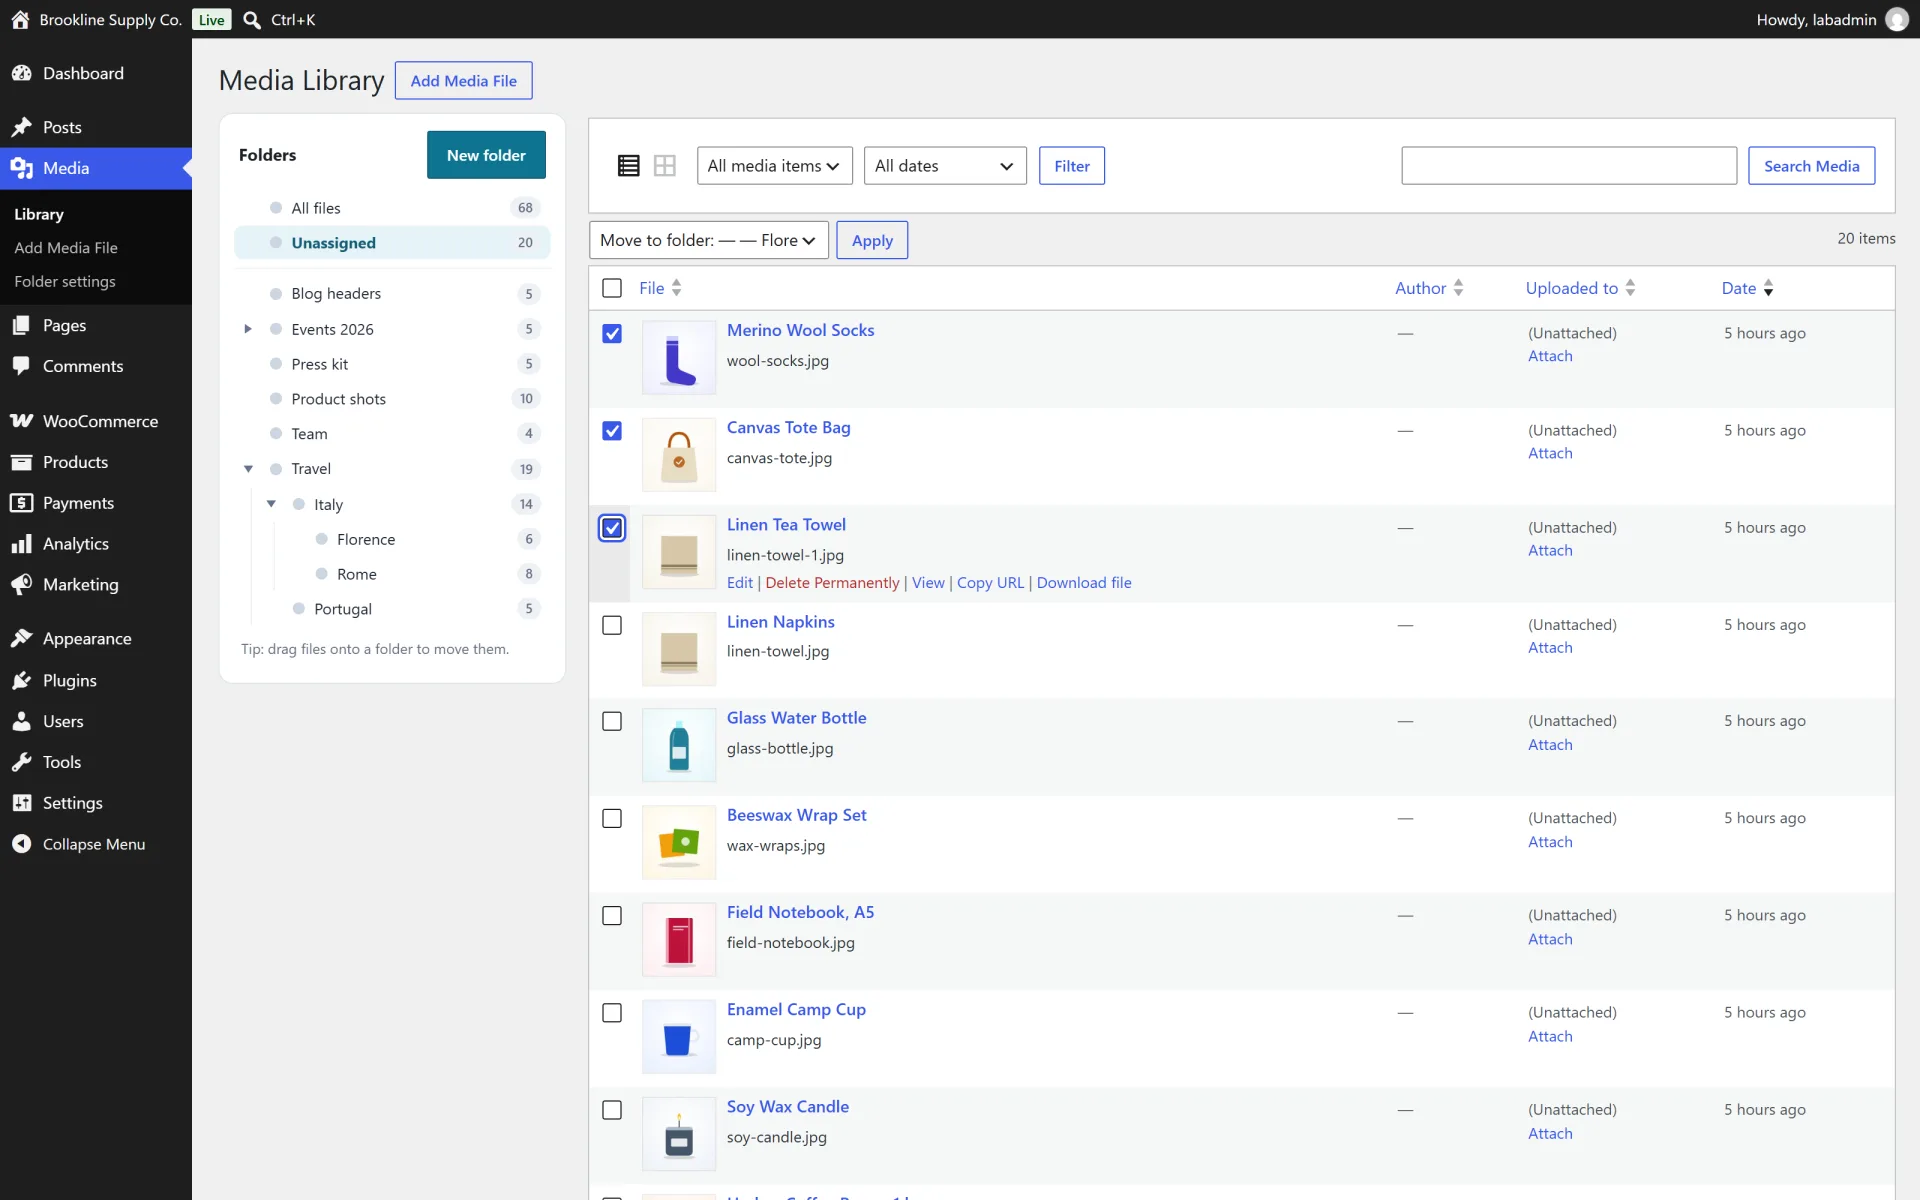
- Bulk action in the list view: "Move to folder" for any folder, or remove from folder
- Uploads go into the folder you have open (can be switched off)
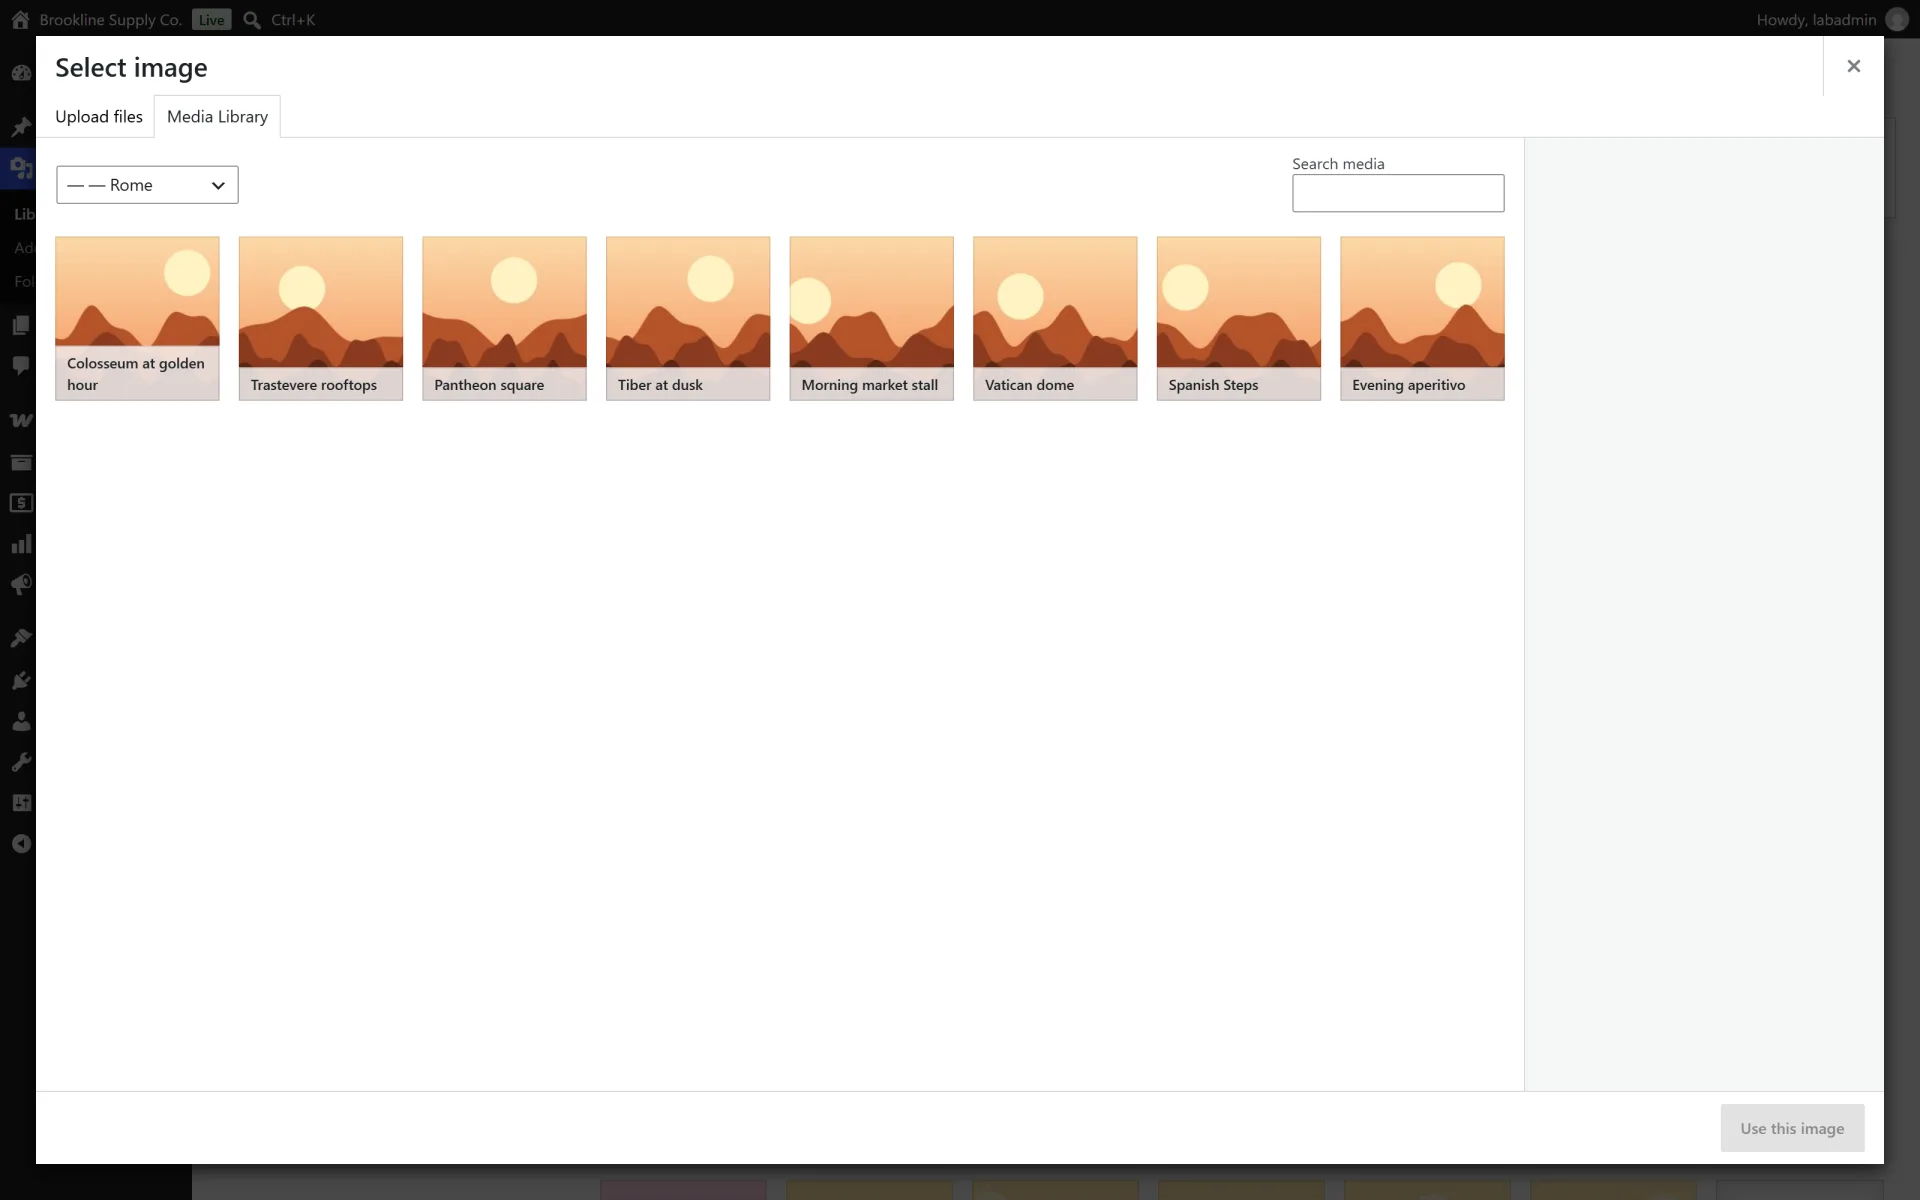
- Folder filter in the media picker of the block editor, classic editor and page builders that use the WordPress media modal
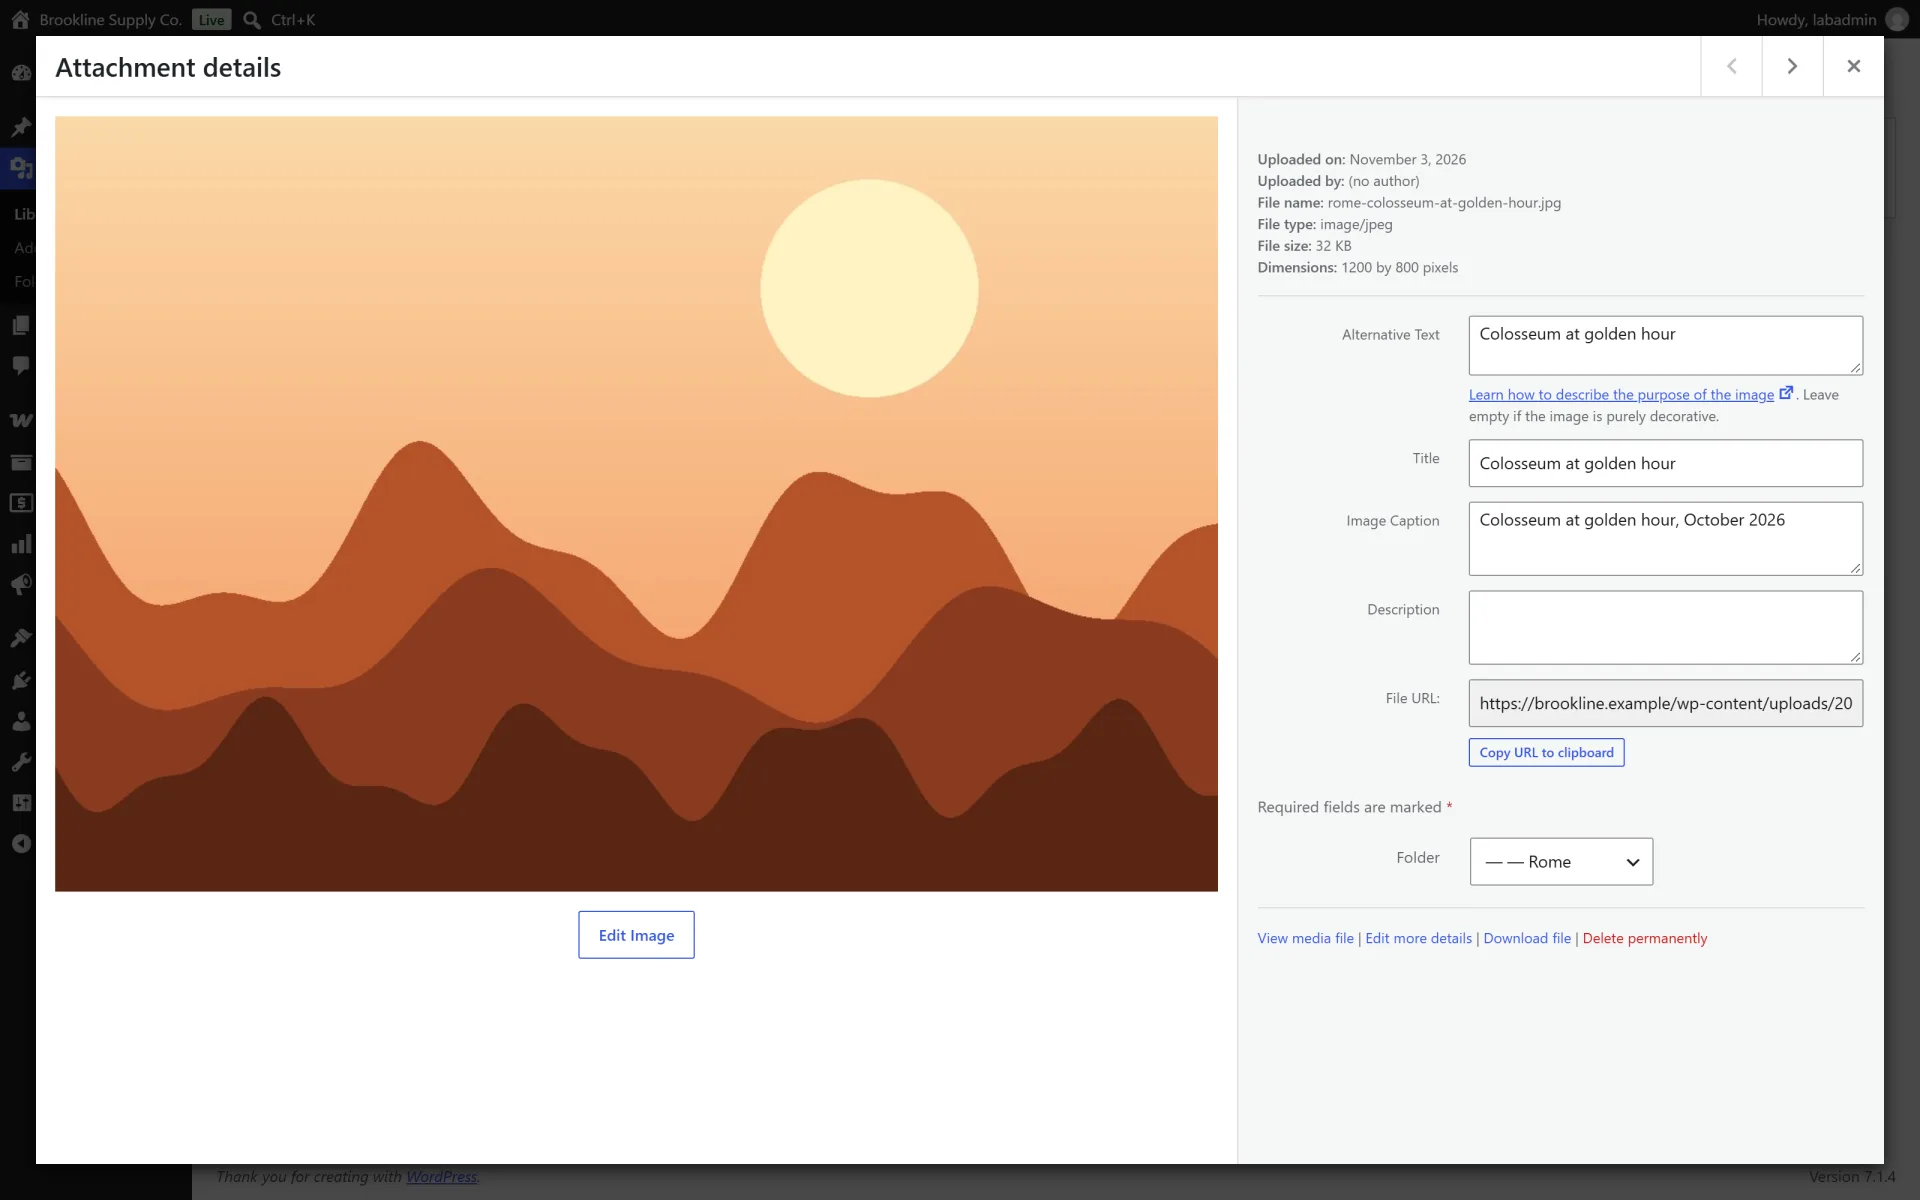
- A Folder field in the attachment details, in the media modal and on the edit screen
- Create, edit, recolour, move and delete folders from the panel. Deleting a folder keeps its files and moves subfolders up
- Choose who can manage folders: everyone who can upload, editors and administrators, or administrators only
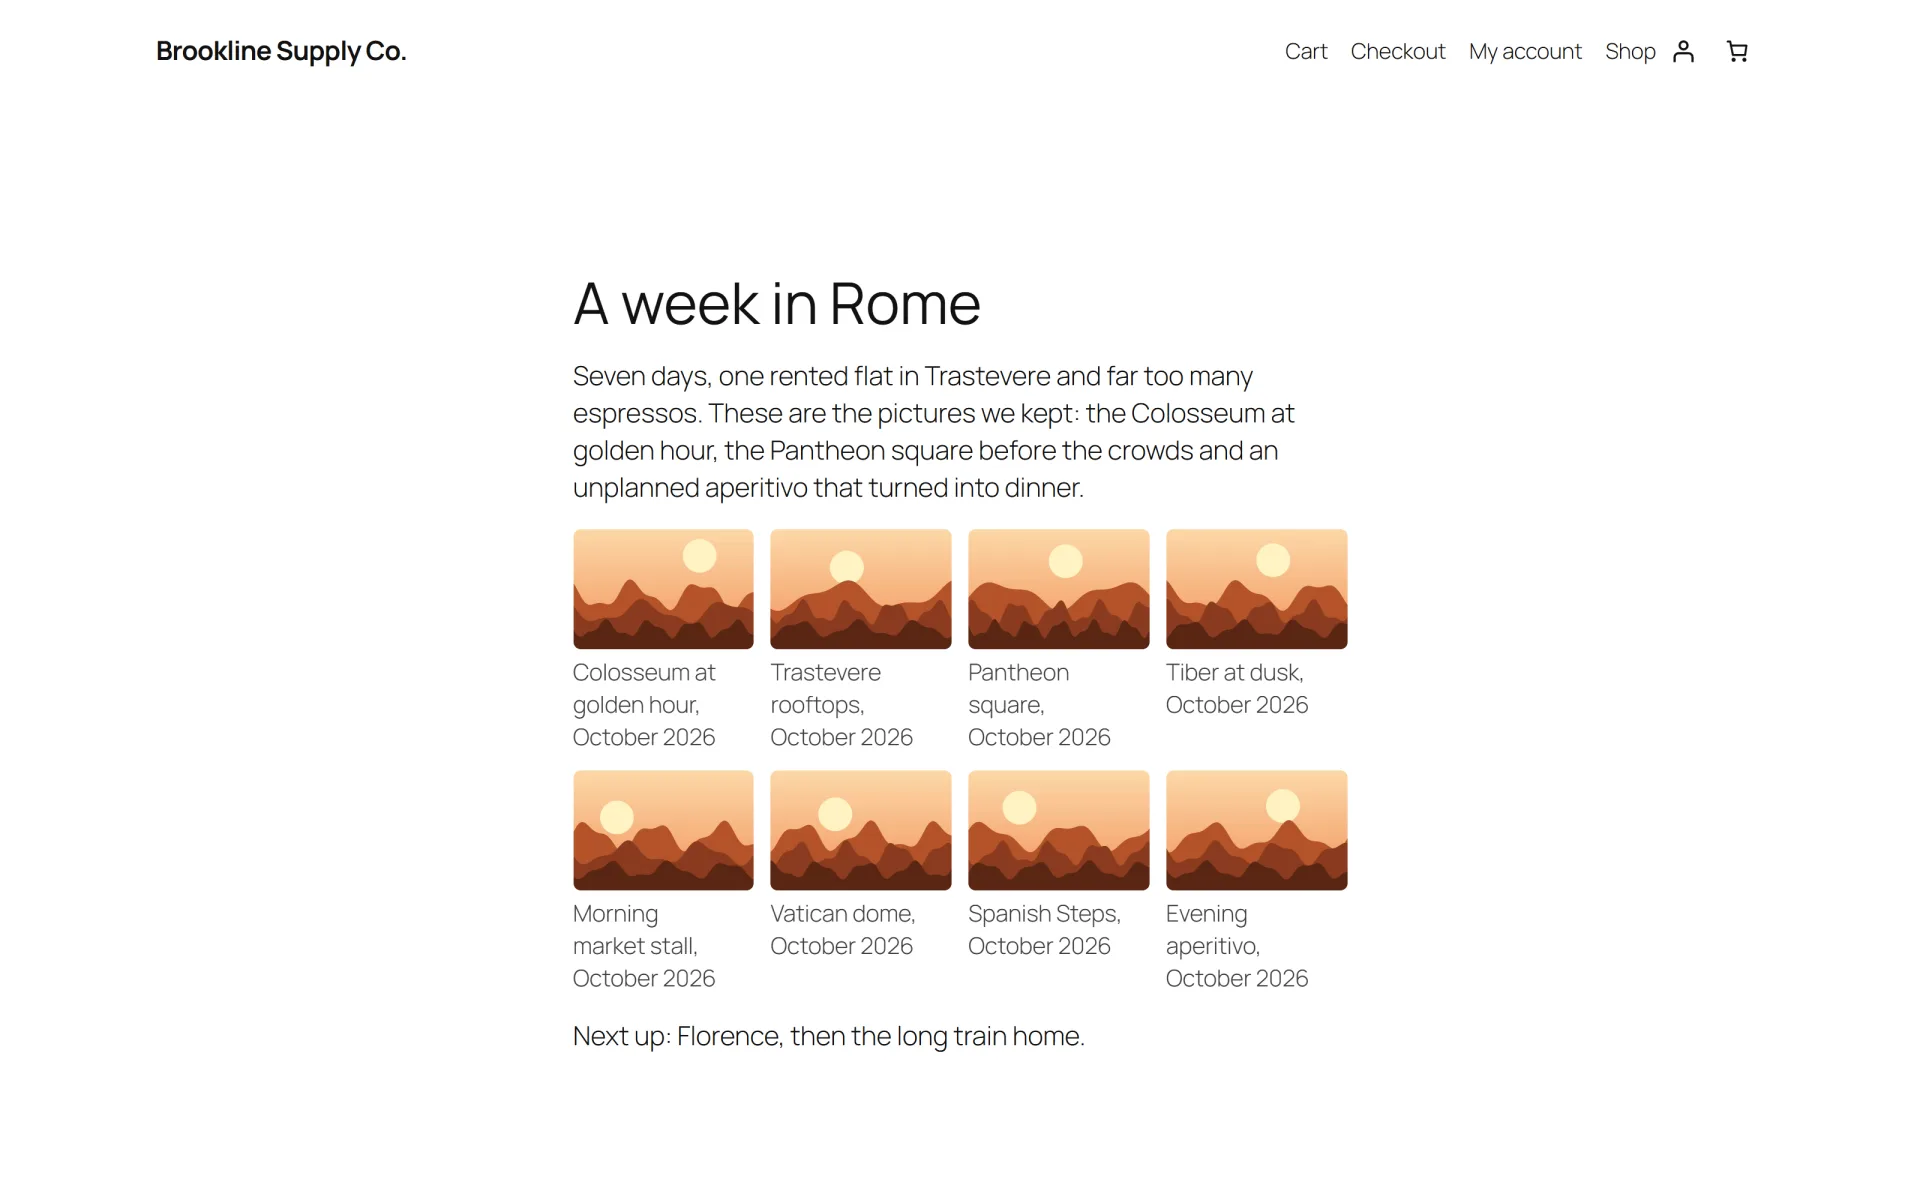
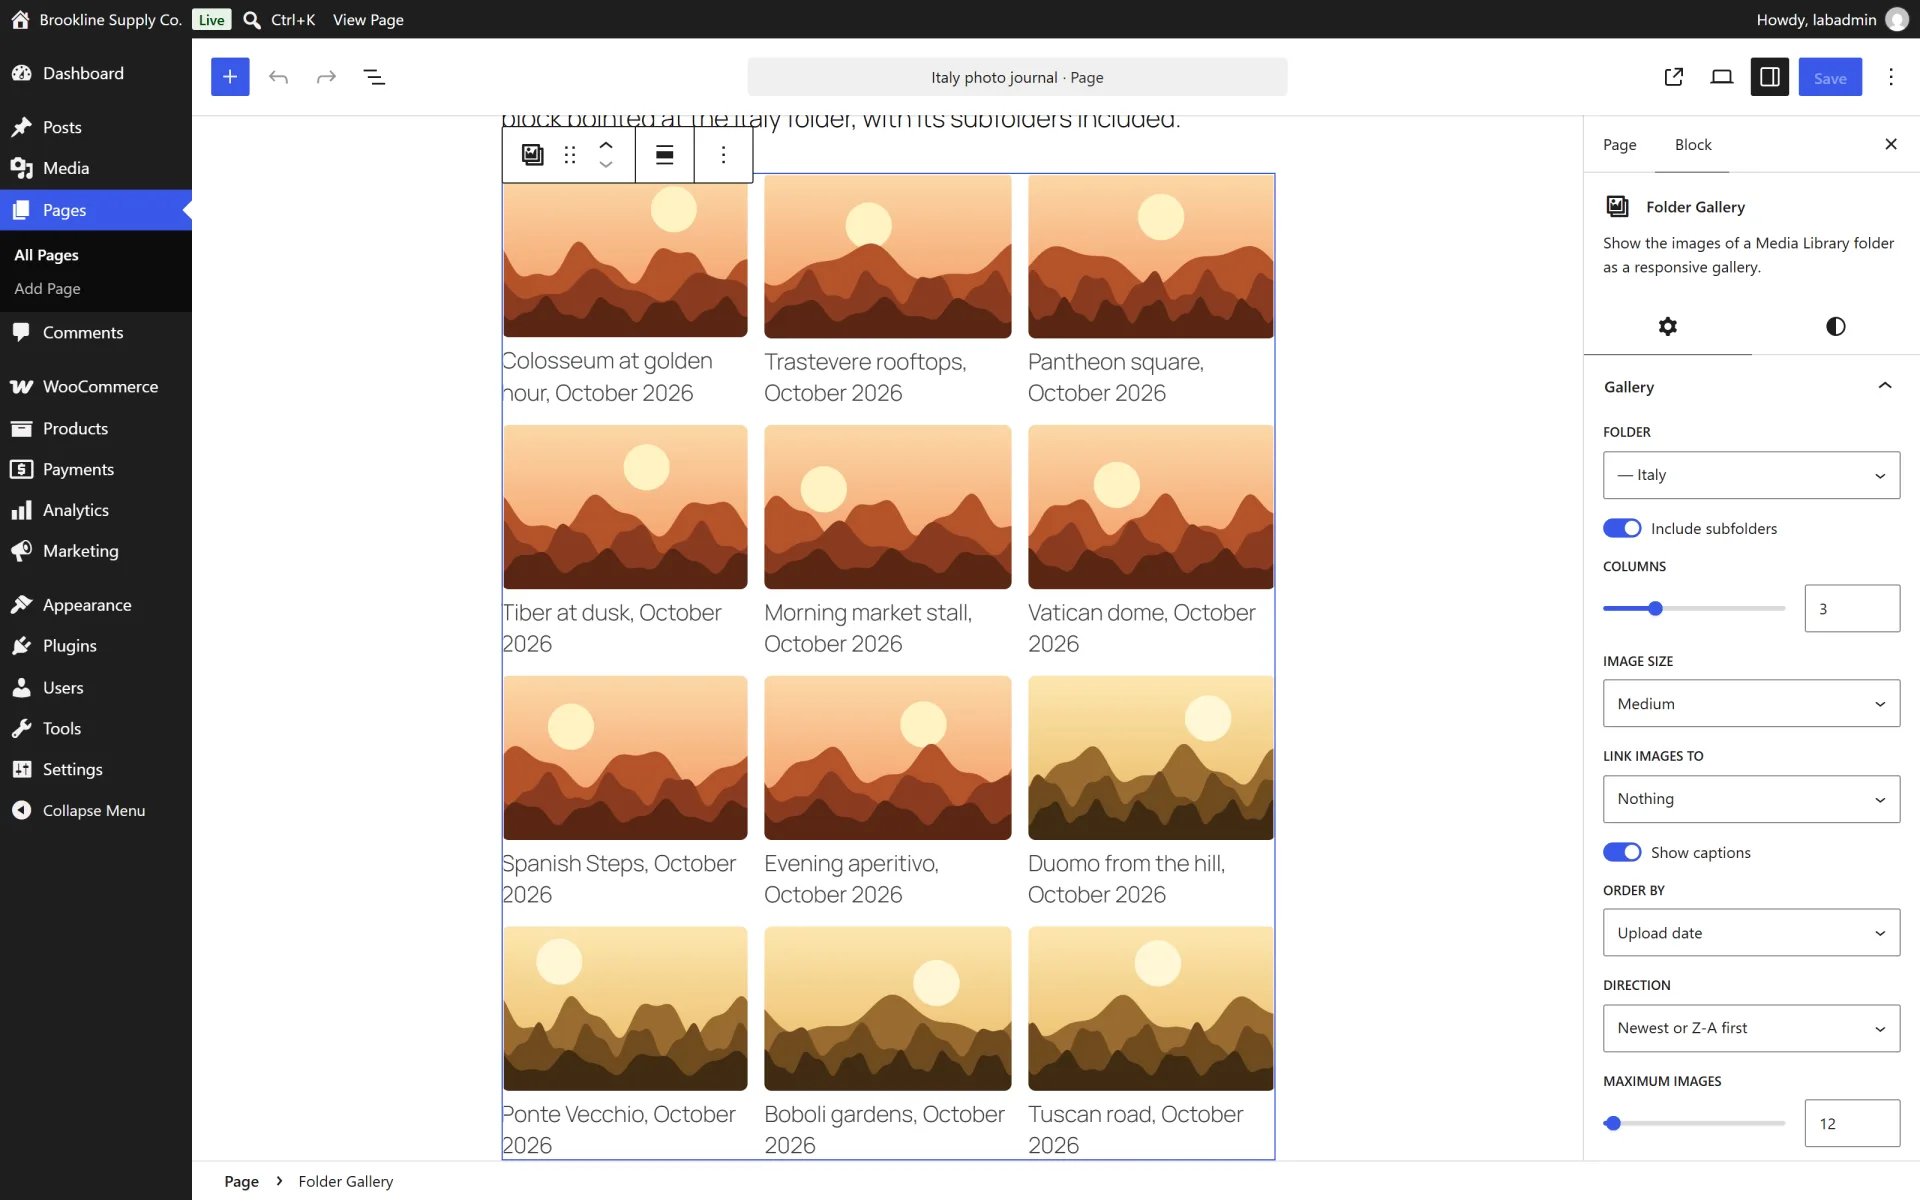
- Folder Gallery block and [shelfmark_gallery] shortcode: columns, image size, links, captions, sort order, limit and optional subfolder images
- Responsive, accessible gallery markup with lazy loaded images, real alt text and no jQuery
- Keeps your files and URLs untouched. Folders are stored in a private taxonomy with no public URLs
- Translation ready, keyboard accessible controls and a clean uninstall option
How it works
Create and arrange folders. Press "New folder" in the panel, choose a name, a parent and a colour. Hover a folder to add a subfolder, edit it or delete it. Click the arrow to expand or collapse a folder with subfolders.
Move files. Drag a file (or several selected files) onto a folder. In the list view you can also tick files and choose "Move to folder: ..." from the bulk actions, or open a file and pick a folder in its details. "Unassigned" lists every file that is not in a folder yet, which is the quickest way to tidy up an existing library.
Upload into a folder. Open a folder and upload as usual: new files are put into that folder. Uploads from the post editor stay unassigned unless you choose a folder in the Folder filter of the media picker first. You can turn this behaviour off in the settings.
Find images in the editor. Wherever WordPress opens the media picker you get a Folder filter next to the other filters. Choose a folder to see only its files (including its subfolders unless you switch that off).
Show a folder as a gallery. Add the "Folder Gallery" block and choose a folder, or use [shelfmark_gallery folder="holiday-2025" columns="3" size="medium" link="file" captions="yes" orderby="date" order="DESC" limit="60" subfolders="yes"]. The folder can be given as an id, a slug or a name. Only images are shown. Link can be none, file or attachment.
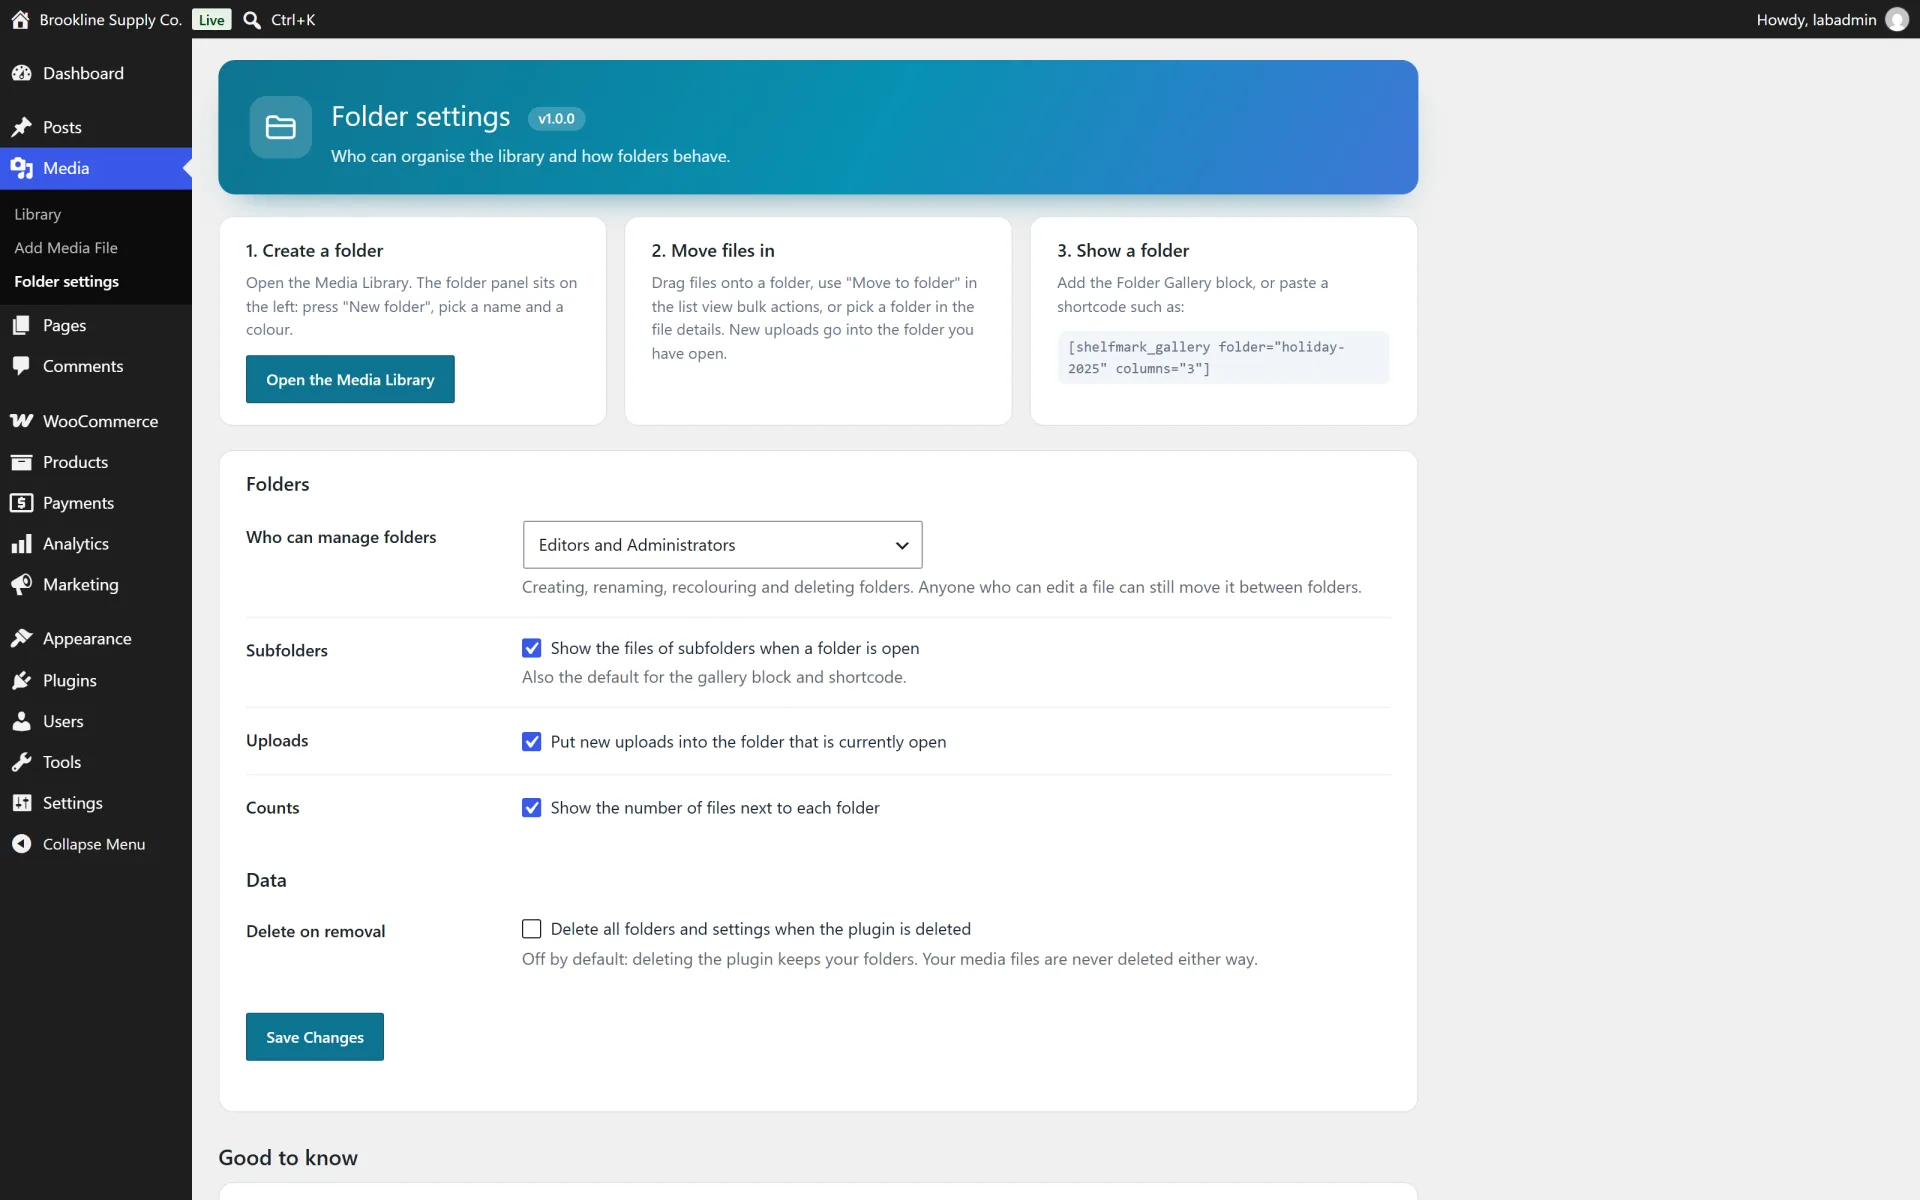
Permissions. Under Media > Folder settings choose who can create, rename and delete folders. Anyone who can upload files can see folders and move the files they are allowed to edit.
Not included (so there are no surprises)
- Moving files on the server or changing upload paths and URLs. Folders are labels in the database.
- Putting posts, pages, products or other post types in folders. Shelfmark organises media files only.
- ZIP export or download of a folder.
- Cloud storage, CDN offloading or syncing with external services.
- A file in several folders at once. A file lives in one folder at a time.
- Image editing, optimisation or lightbox effects. Gallery links open the image file or its attachment page.
Install in minutes
- In your WordPress admin open Plugins > Add New > Upload Plugin and choose the downloaded zip (the one named shelfmark-media-folders-v1.0.0.zip).
- Click Install Now, then Activate.
- Open Media > Library. The folder panel appears next to your files. Press "New folder" to create the first folder.
- Drag files onto a folder, or use Bulk select > "Move to folder" in the list view.
- To show a folder on a page, add the Folder Gallery block or paste [shelfmark_gallery folder="your-folder"].
- Optional: review Media > Folder settings for who can manage folders and what happens on removal.
What is in the download
- The ready-to-upload WordPress plugin (
shelfmark-media-folders), organised in namespaced PHP classes
readme.txt in WordPress.org format, a full HTML documentation page in docs/ and a CHANGELOG.mdlicense.txt (GNU GPL v2) and a translation template in languages/- A careful uninstall: your data is kept when you delete the plugin, unless you tick the "delete data" option in the plugin settings first. Your media files are never deleted.
About the screenshots
The gallery shows the plugin running on a private test site ("Brookline Supply Co.") with sample images generated for the screenshots, not a public demo. There is no hosted live demo for this plugin.
Third-party product and network names mentioned (WordPress, WooCommerce and others) are trademarks of their respective owners. This plugin is an independent product and is not affiliated with or endorsed by them.